Technical Overview & Working Principle
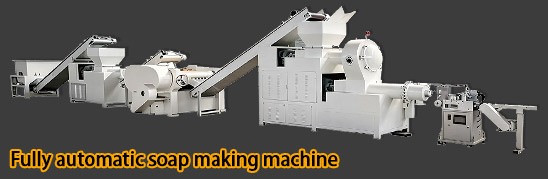
The automatic duplex vacuum plodder consists of two sequentially arranged extrusion stages: the upper refining stage and the lower extruding stage, connected by a sealed vacuum chamber.
Upper Stage (Refining): Milled soap noodles are fed into the upper hopper. Dual counter-rotating worm screws compress and shear the soap against a perforated pelletizing plate, transforming the mass into fine noodles.
Vacuum De-aeration: As the soap noodles pass into the middle vacuum chamber, a high-vacuum pump extracts trapped air bubbles and residual moisture. This prevents internal cracking and ensures a smooth, translucent bar finish.
Lower Stage (Final Extrusion): The de-aerated soap falls into the lower barrel. Heavy-duty extrusion screws press the soap mass through a temperature-controlled extrusion cone and die, discharging a continuous, solid soap log (billet) with uniform density.
Technical Specifications
Parameter Specification
Production Capacity 500 – 2,000 kg/hour (customizable)
Plodder Type Duplex Vacuum Screw Extruder
Screw Diameter 200 mm – 300 mm
Vacuum Degree -0.08 MPa to -0.095 MPa
Material Contact parts in Stainless Steel (SS304 / SS316)
Temperature Control Circulating water heating/cooling jacket on extrusion head
1
Pre-Operation Safety & Setup Checklist
Perform before starting power distribution
Inspect the extrusion barrels, vacuum chamber, and die cone to ensure no foreign solid objects are inside.
Verify that the cooling water circulation system is connected and functioning properly to manage barrel friction heat.
Start the water heating circulation unit for the front discharge die and preheat the nozzle temperature to 50°C – 60°C.
Ensure gearbox oil levels are within normal operating ranges and emergency stop switches respond correctly.
2
Startup Procedure
Sequential motor activation
Turn on the main electrical isolator switch on the control panel.
Start the cooling water pump and verify water flow through the jacketed barrels.
Turn on the vacuum pump and allow the vacuum gauge on the vacuum chamber to reach -0.08 MPa or higher.
Start the lower plodder motor at low frequency using the Variable Frequency Drive (VFD), then gradually ramp up to target speed.
Start the upper plodder motor and synchronize its speed with the lower stage to maintain steady material flow.
3
Feeding & In-Process Calibration
Standard operating phase
Begin feeding refined soap noodles into the upper hopper via conveyor belt. Maintain continuous, even feeding to prevent bridging.
Observe the sight glass on the vacuum chamber; ensure soap does not over-accumulate or block the vacuum port.
Monitor the extruded soap log at the discharge die. Adjust the die heater temperature if the bar surface exhibits rough skin (too cold) or excessive softness (too hot).
Maintain steady extrusion pressure to ensure consistent soap density prior to entering the automatic cutting machine.
4
Shutdown & Cleanout Sequence
Post-production procedure
Stop the feeding conveyor and allow the upper hopper to empty completely.
Turn off the upper plodder motor.
Turn off the vacuum pump and open the vacuum release valve to equalize chamber pressure.
Run the lower plodder until remaining soap inside the extrusion barrel is purged, then stop the main motor.
Disconnect main power, open the front die head, and clean out residual soap while the machinery remains warm.
Maintenance & Troubleshooting Guidelines
Daily: Clear residual soap from the vacuum chamber sight glass and discharge cone; check water jacket temperatures.
Weekly: Inspect drive chains, gear couplings, and screw seals for wear or grease leakage.
Monthly: Check gearbox oil quality, clean vacuum pump filters, and tighten all structural fasteners.
Tianjin Bright Machinery Equipment Co., Ltd. is a leading manufacturer specializing in automatic soap-making machinery and pharmaceutical packaging equipment. With nearly two decades of expertise, our high-performance solutions range from soap processing lines (toilet and laundry soap) to capsule fillers, tablet presses, blister packing, and cartoning machines, widely serving the personal care, food, and pharmaceutical industries.Certified with ISO9001 and CE standards, we ensure premium quality, innovative technology, and full compliance with strict global standards. Driven by our philosophy—"Not the best, but better"—we offer tailor-made automation solutions, complete technical support, and dedicated after-sales services to clients across more than 100 countries worldwide.
Contact Person:Jenna Liu
Tel/WhatsApp:8615522869921
E-mail:emily@tjbrightmachine.com
Add: Yinzuo Building, No. 35, Second Avenue, Tianjin TEDA